During an ongoing Event, your viewer may request support from you because of an IP change to their connection or their browser crashed and require it to be locked again.
Customer Event Management
Upon activation of an Event (Service), the customer is provided an Event Ticket ID mapped to the purchase.
Your customer can find the Event Ticket ID but logging into the Client Area → Services (Tab) → My Live Events.
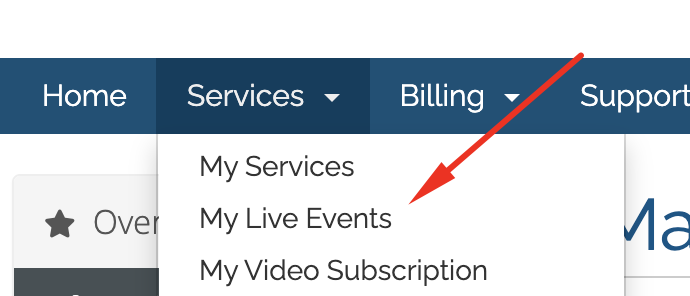
Click on the Active button of the Event Name.
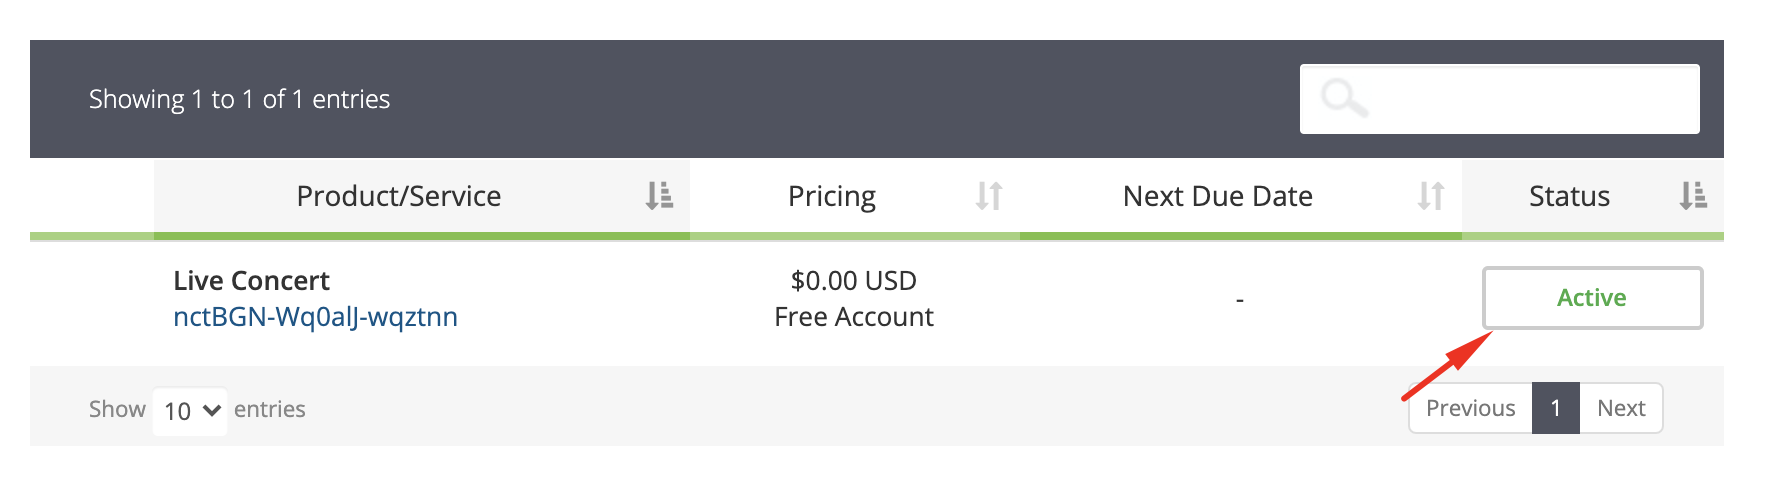
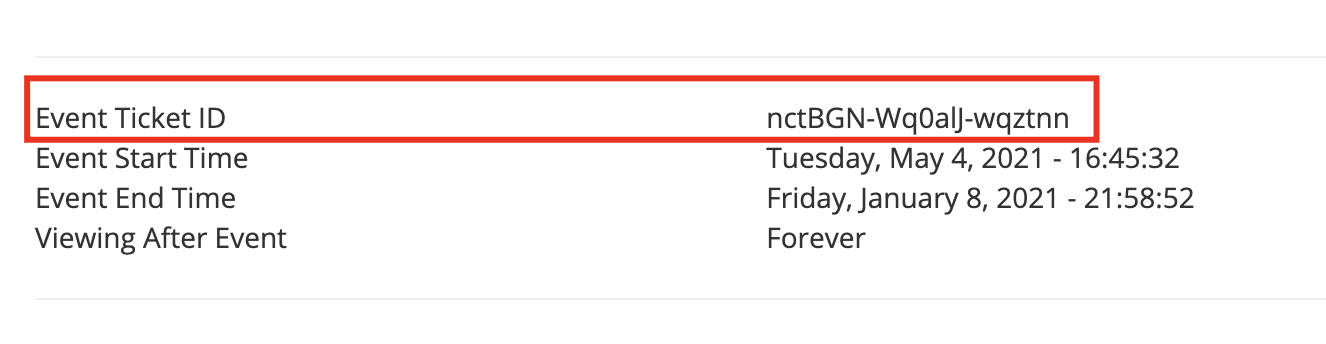
On the following page, your customer will find the Event Ticket ID at the bottom of the page.
When you paste that Event Ticket ID into the WHMCS Admin search (Top right hand corner), the system will return the Service page link of the associated service that your customer had purchased.
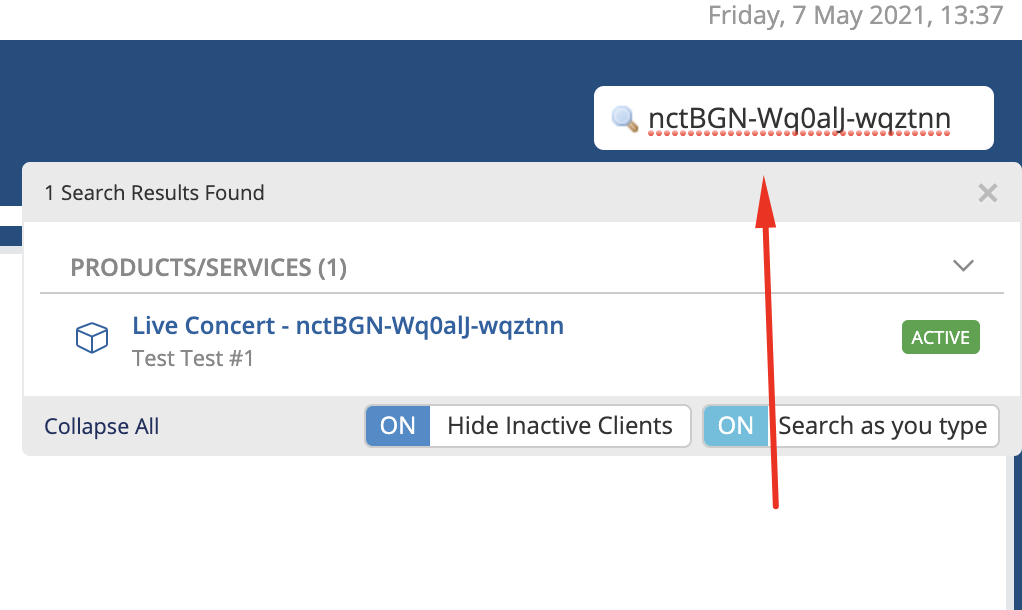
Click on the blue link to goto that service.
Service Event Page (Admin)
On the service page, you will find important functions under Module Commands that will help you run your Event smoothly.
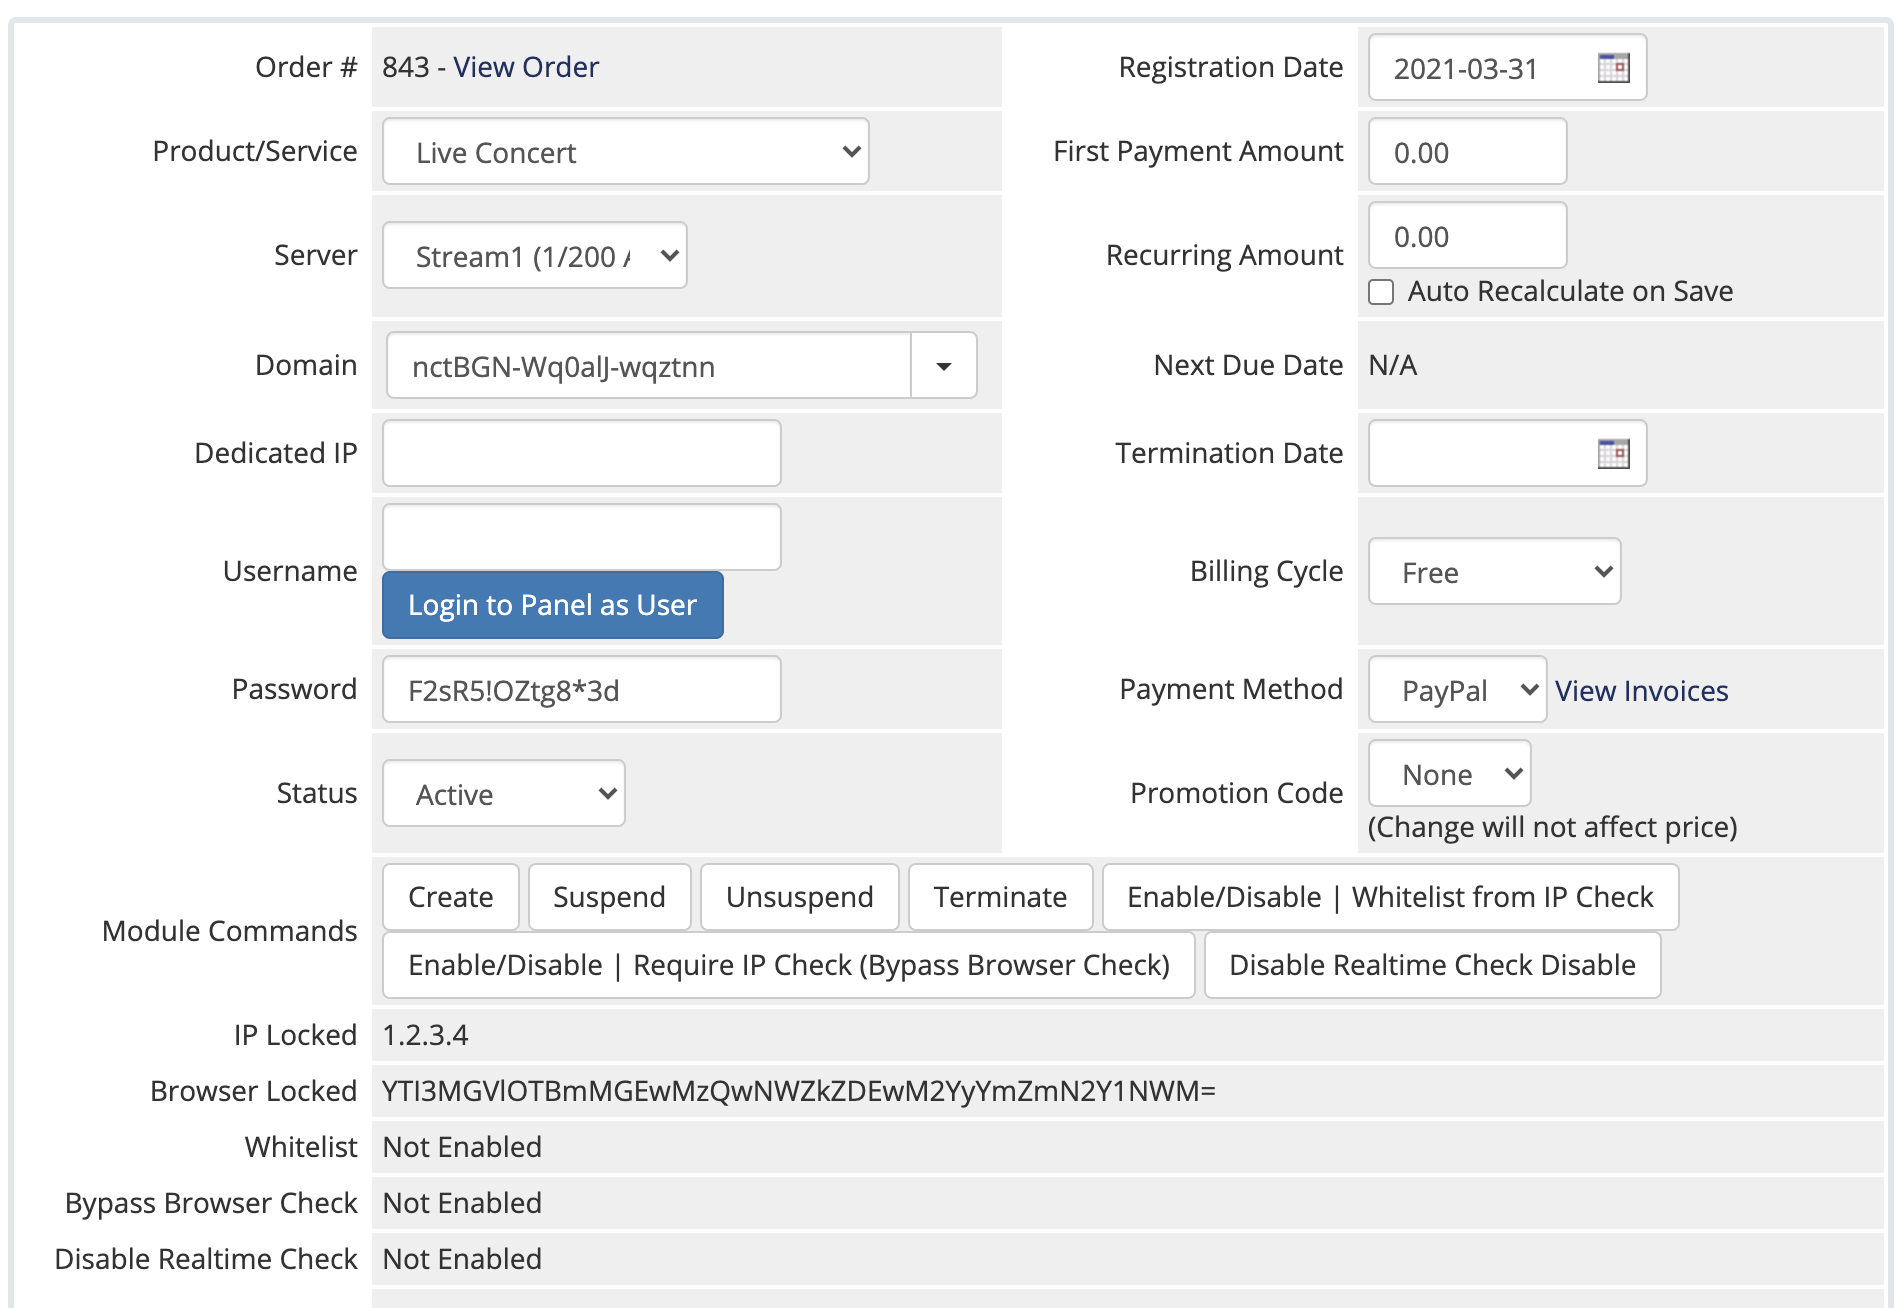
| Function | |
|---|---|
| Create | This will provision the Service to the customer. If the service is not provisioned, the customer will not be able to view it |
| Suspend / Unsuspend | If the service is suspended for a particular customer, this customer will not longer be able to view the event |
| Terminate | If you don't want the customer to have access to a Event page in the Client area. You can run the terminate function. |
| Enable/Disable (Whitelist from IP Check) | Enabling this will allow the customer to bypass the IP check (If it is enabled globally) |
| Enable/Disable (Require IP Check "Bypass Browser Check") | Enabling this will allow the customer to bypass the Browser Check but IP check is still in consideration. This option will allow the customer to access the event (after logging in ) on another browser/computer/device, if the IP address is the same |
| Disable Realtime Check | Enabling this will disable the Realtime check that runs during an Event. The Realtime check allows for the system to check if the Locked IP to the service is really the only viewer for the Event. For example, if the global option (Disallow IP Re-locking) is not enabled, then the customer could log in with one IP address then IP lock it while staying on the page. Then the customer friend can log in again and perform the same procedure. |
Beneath the Module Commands, you will find the service status
The page outline how you can create a Live Event for sale
Creating a Product
In order for the Event to be available for order and purchase, a Product must be created under your WHMCS.
To do this, goto the Admin section of your WHMCS → Setup → Products/Services → Products/Services
Now click on the Create a New Product button at the top.
On the next page, you will need to fill in the few options; Product Type, Product Group, Product Name, Module, Create as Hidden
Once the product is added to your WHMCS, you should now see the following page.
There are a few more fields that you will need to adjust before putting the Live Event for sale. We will list the important ones that is crucial to the functionality. Let's take a look.
Details Tab
Pricing Tab
This tab is pretty self explanatory. You can set the Live Event you are selling as Free, One time fee.
Module Settings
This is the last important setting you will have to set for the Live Event. However, we will leave it and return to here after the next section.
Creating the Live Event
The next step we need to do is to define the Event. To do this, click on Addons → WHMCS Streaming Paywall in the Admin section.
You should now see the following screen.
Now, click on Events and you will see the following Add Event form
Event Properties
Once are you ready, hit Save.
Assigning the Event to the Product
Now lets add the Event back to the Product (Event) you had created at the beginning
Go back to the Product you created at the very beginning on this page, then click on the Module Settings tab.
Now select the Event you want to assign to this Product (Live Event) in Event dropdown.
At the bottom of the page you can set how the system provision the Product when somebody purchase it.
| Table of Contents | ||
|---|---|---|
|