If your remote server uses a PHP handler or web server that doesn't support writing of files with nobody ownership. Then you can use the following workaround.
To do this, you simply need to
Create a system/hosting account
Have a VHOST that is web accessible and ownership mapped to the system/hosting account in Step 1
Place the remote server in the document root (public_html) for the VHOST
Modify CSFSettings.php and reflect the changes. The most important ones are, $fileOwner and $fileGroup. Make sure they match the system account in Step 1
Now create a cronjob as root that runs that CSFUnblockremote.php with the argument of cron
An example cronjob would be
*/2 * * * * php -q /home/newaccount/public_html/CSFUnblockremote.php cron > /dev/null 2>&1
If your system wide php.ini have functions disabled, then it is advisable that you make a copy of the php.ini file and place within the system/hosting account's web space to use it with the cronjob. It will allow for bypass your system wide settings to make the module functional.
Now just add the VHOST URL in the ADMIN Interface on your WHMCS to complete the install.
cPanel Example
Here is a example if you are using a cPanel remote server.
Create a cPanel account (We use the account name csfremote for this example), with a domain remoteserver1.domain.com
Upload the remote server files in the public_html of csfremote. So it would be /home/csfremote/public_html/
Open CSFSettings.php and change $fileOwner and $fileGroup to $fileOwner = 'csfremote'; and $fileGroup = 'csfremote';
Create a cronjob as root (MUST BE ROOT)
*/1 * * * * php -q /home/csfremote/public_html/CSFUnblockremote.php cron > /dev/null 2>&1
if you want to load a customized php.ini
*/1 * * * * php -c /home/csfremote/php.ini -q /home/csfremote/public_html/CSFUnblockremote.php cron > /dev/null 2>&1
Central Portal (v4.6)
The Central Portal allow for your customer to see all hosting packages under one simply page without going into the actual Service page to perform a unblock function.
To enable the Central Portal, go into WHMCS → Settings → Addon Modules → CSF Unblocker Admin Module → Configure
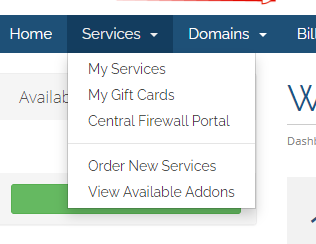
Enable the following options. Central Portal and Add Central Portal to Service Menu.
The Central Portal will now be under the WHMCS Services menu in the client area.
If you want to have the Central Portal link at another place, you can use the following URL.
index.php?m=csfunblock&action=portal