Once you have activated the module you can now goto Addons → WHMCS CSF Unblocker to access the module.

There are few things you need to consider when adding the server onto the listing of servers under this module.
Parameters | Explanation |
|---|
| IP Address | This MUST match the IP of the hosting package (WHMCS → Product → Servers) it is using. |
| Server Name | This will be the display name during the unblocking steps |
| Hash | This must match the $hash in the remote server settings file (CSFSettings.php) |
| Web Address | This must be a web accessible address that CSFUnblockremote.php can be reached via HTTP or HTTPS on the remote server without trailing /. For example, https://yourserver.domain.com |
| X List | The remote server's Deny list |
| Temp X List | The remote server's temp deny list |
| White List | The remote server's whitelist |
| Generate Hash on Server | This will update the hash on the remote server automatically |
| Update Remote | This will update the module package on the remote server |
| Mass Hash Update | This will update all the hash recorded on WHMCS, note it will NOT update the $hash in the remote CSFSettings.php file |
Important
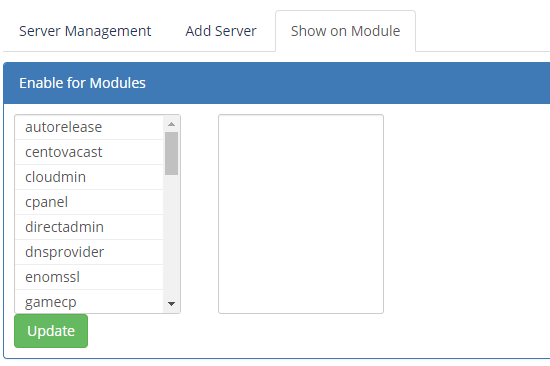
Show on Module
In order for the Unblocker module to show up in the WHMCS client area, you must enable it for at least one WHMCS Provisioning Module. To do this, goto the CSF Unblocker Admin Interface → Show on Module tab

Once there, you can set which WHMCS provisioning module will have access to the CSF Unblocker
For example, if your shared hosting plans run on DirectAdmin then enable it for DirectAdmin.
Remote Server Connection Test
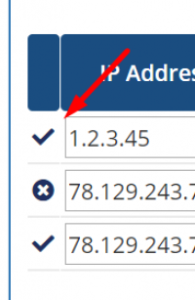
You can run the connection test by clicking on the first column's icon in the Server Listing.
