The page outline how you can create a Video Membership
Creating a Product
In order for the Video membership to be available for order and purchase, a Product must be created under your WHMCS.
To do this, goto the Admin section of your WHMCS → Setup → Products/Services → Products/Services
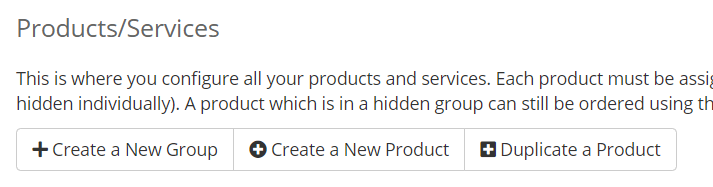
Now click on the Create a New Product button at the top.
On the next page, you will need to fill in the few options; Product Type, Product Group, Product Name, Module, Create as Hidden
Product Type: Other
Product Group/Product Name: Your Choice
Module: PayWall VOD Provisioning Module
Create as Hidden: Off
Once the product is added to your WHMCS, you should now see the following page.
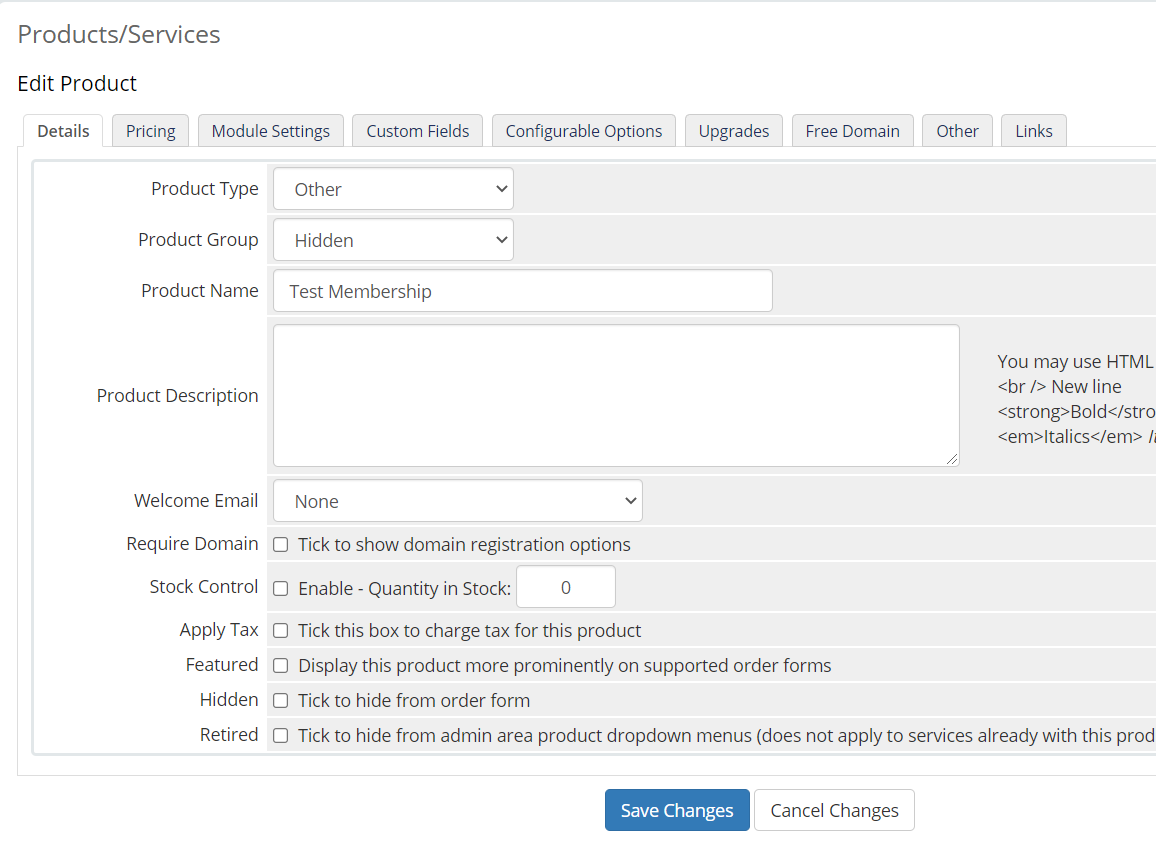
There are a few more fields that you will need to adjust before putting the membership for sale. We will list the important ones that is crucial to the functionality. Let's take a look.
Details Tab
Welcome Email - This is where the system will send an email to your membership buyer when the plan is activated for use.
Stock Control - If you want to limit how many plans to sell
Apply Tax - If you want the buyer to pay tax on the purchase
Masked Redirection (new in v1.2)
With the introduction of this new feature, you client can now create Redirection with masking. What Masked Redirection will allow the URL to show the original domain URL while the content body is of another page.
In order to use this function, you must include the remote connector file in your webtemplate.zip.
Email Forwarding & Catch-All (Premium/Professional Edition)
Similar to Web Redirect. Your client can setup Email Forwarding / Catch-All without a hosting plan.
In order to use Forwarding and Catch-all. The following steps must be followed
Add a Email Destination
Verify the Email Destination by entering the Pin
Create a Alias
Add the Email Destination to the Alias or Catch-all
If the pin variable didn't get inserted into the email template during installation. You can use {$pin} as the variable.
Domain Parking WebTemplate (Professional Edition)
If you wish to setup a generic pages for your client's domain similar to big registars's parking pages with their registration, you would need to do the following steps.
Prepare the list of files you want to include for the client's domain. For sake of simplicity and storage, it is recommended for you to only use one html or php file. You can load all images, css, js using external sources. This way it will cut down the disk storage us per domain
Zip the list of files up in a zip format file. Note: all files must be in the root of the zip file
Go into the Module's configuration and fill in the Web template file name of the zip file you just created in Step 2. Note this is case sensitive and you must use the full file name. Eg. webtemplate.zip
Place the zip file in the root of your main DirectAdmin account. The root is where you will find default directories, such as domains, imap, mail, MailDir, public_html, tmp.
| Note | ||
|---|---|---|
| ||
Do not place the zip into public_html |
That's it. Now whenever you have a new domain created on the DA server. The module will extract that webtemplate.zip into the public_html of the newly created domain. When the domain's nameserver is point to the DirectAdmin server, the generic parking page you used will now show up.
This feature is useful if you want to do any analytics data on the domains you sell, etc.
DNS Templates (Professional Edition)
DNS Templates is useful when you want to apply reoccurring DNS settings to a domain. Such as Gmail, Outlook, Shopify etc.
DNS Templates can be used with all DNS records. By default, when a Template is being loaded onto a domain, all records for that domain will be removed. You can select the Preserve Current DNS settings option when loading the template to tell the module to not override the current DNS records
Dynamic DNS (DDNS) Support (Professional Edition)
The Dynamic DNS API is use when the client wish to update a A record without having to log into your client area.
Use case:
It can be automated such as when a client's home WAN connection changes IP and they can set their router to remotely hit the module's API to update it's A record that point's to their home IP address.
Example
If your WHMCS domain is abc.com, then your client would use the following URL to call the API
https://abc.com/index.php?m=dnssuite&action=ddns&keyphrase=keyphrase&pass=pass
The client can locate the keyphrase and pass for each individual domain after they have loaded the Domain to manage in the Client Frontend.
There are additional API options they can use.
https://abc.com/index.php?m=dnssuite&action=ddns&keyphrase=keyphrase&pass=pass&host=ftpwill create/update the FTP A record.
https://abc.com/index.php?m=dnssuite&action=ddns&keyphrase=keyphrase&pass=pass&host=ftp&ip=1.2.3.4| Info | ||
|---|---|---|
| ||
If you use proxy server like CloudFlare, you would need to setup in the configuration.php of WHMCS to relay the proxy's IP to $_SERVER[“REMOTE_ADDR”]. Otherwise, the module will only able to get the proxy's IP |
https://abc.com/index.php?m=dnssuite&action=ddns&keyphrase=keyphrase&pass=pass&host=ftp&ip=2001:db8:a0b:12f0::1&ipv6=yesPricing Tab
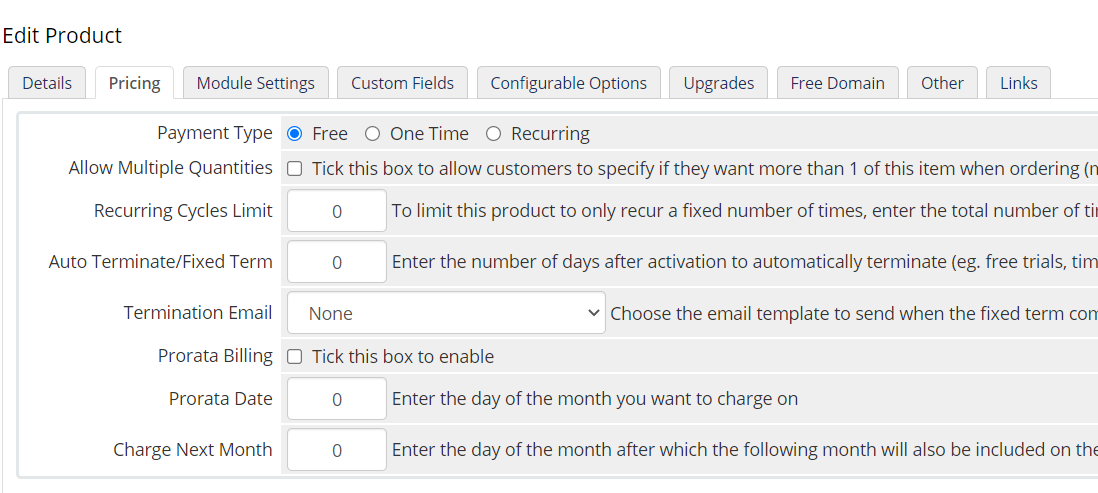
This tab is pretty self explanatory. You can set the membership you are selling as Free, One time fee or Recurring.
Module Settings
This is the last important setting you will have to set for the membership. However, we will leave it and return to here after the next section.
Creating the Plan
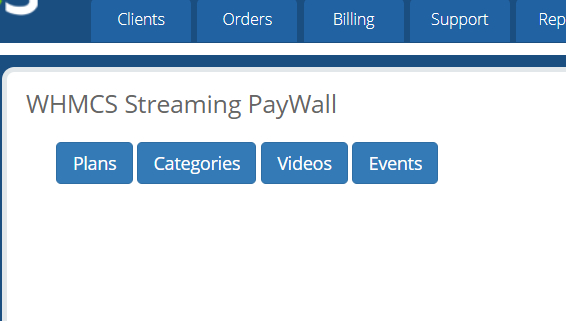
The next step we need to do is to define the membership plan. To do this, click on Addons → WHMCS Streaming Paywall in the Admin section.
You should now see the following screen.
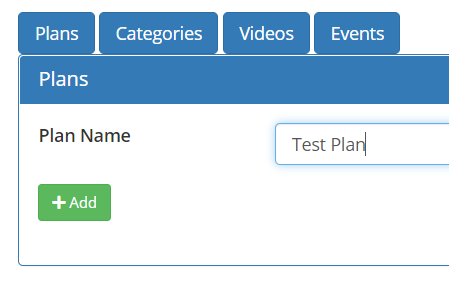
Now, click on Plans and proceed to add a new Plan name.
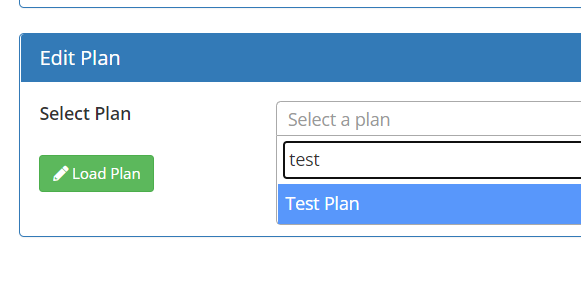
If you go type your plan name in the Edit Plan section you should see the plan you just created.
We will skip the editing plan for now and goto the next section. Categories.
Creating a Category
Similar to Adding Plans, create a Category now.
Now load up the category you just created in the Edit Category drop down bar. You should now see the following screen.
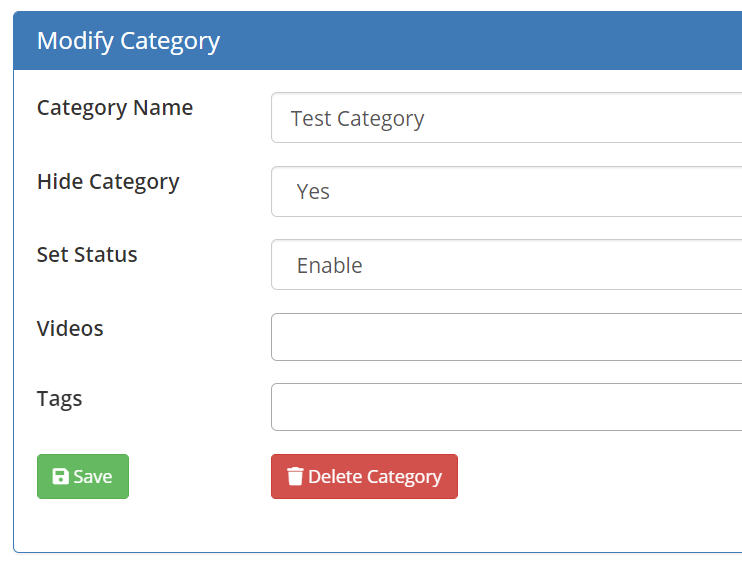
Category Properties
The follow properties are as follows.
| Setting | |
|---|---|
| Hide Category | This setting will hide the category from the sidebar category menu |
| Set Status | This setting will enable/disable the category completely |
| Videos | This is all the videos listed in the category |
| Tags | This will be the tags that apply to this category |
Now that you have setup this category, lets move onto the adding a new Video.
Adding a Video
Now click on the Videos tab, you should see the following video adding form.
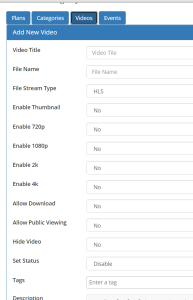
The follow properties are as follows.
Video Properties
| Setting | |
|---|---|
| Video Title | The display name of the video |
| File Name | The is the relative name of the video file. If your file name is video.mp4, then enter video.mp4 into this field |
| File Steam Type | Depending of your video server, it can set to either HLS streaming or direct HTTP viewing |
| Enable Thumbnail | Enable showing for a thumbnail |
| The thumbnail file name | |
| Enable 720p quality | |
| The relative name of the 720p filename. If your 720p filename is video_720.mp4, then enter video_720.mp4. Otherwise, you can leave it blank and the system will automatically append _720p into the original filename. | |
| Enable 1080p quality | |
| The relative name of the 1080p filename. If your 1080p filename is video_1080.mp4, then enter video_1080.mp4. Otherwise, you can leave it blank and the system will automatically append _1080p into the original filename. | |
| Enable 2k quality | |
| The relative name of the 2k filename. If your 2k filename is video_2k.mp4, then enter video_2k.mp4. Otherwise, you can leave it blank and the system will automatically append _2k into the original filename. | |
| Enable 4k quality | |
| The relative name of the 4k filename. If your 4k filename is video_4k.mp4, then enter video_4k.mp4. Otherwise, you can leave it blank and the system will automatically append _4k into the original filename. | |
| Allow download of the video | |
| Set the number of times the video can be downloaded | |
| The direct video download file name. This URL will be proxied through the system, it will not be revealed to the viewer | |
| Allow the video to be viewed without logging int | |
| Set the Video to be hidden | |
| Enable/disable the video. Once disabled the video will not be able to viewed | |
| Tags | The tags for the video |
| Description | The description of the video |
| Info | ||
|---|---|---|
| ||
For videos that can be publicly viewed. Your will need to define a Public VOD server first. |
Once it is ready, Save it.
Now that you have a video added, let's assign it to a Category.
Assigning a Video to a category
Lets reopen the Categories tab, and load up the category you want to put the video in.
Under the Videos field, type in the video name you want to add it. You should now see it in the drop down menu, select it.
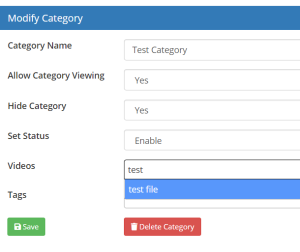
Save the Category once you are ready.
Assigning the Category to the Plan
Go back to the Plans tab and load up the Plan you want to assign a Category in.
Type in the name of the Category you wish to assign in the Category field, you should be able to select it from the drop down and then Save it once you are done.
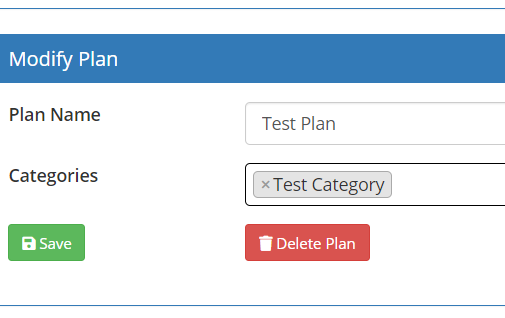
Now you have the Plan ready with all the Categories you want. Lets add it back to the Product (Membership)
Go back to the Product you created at the very beginning on this page, then click on the Module Settings tab.
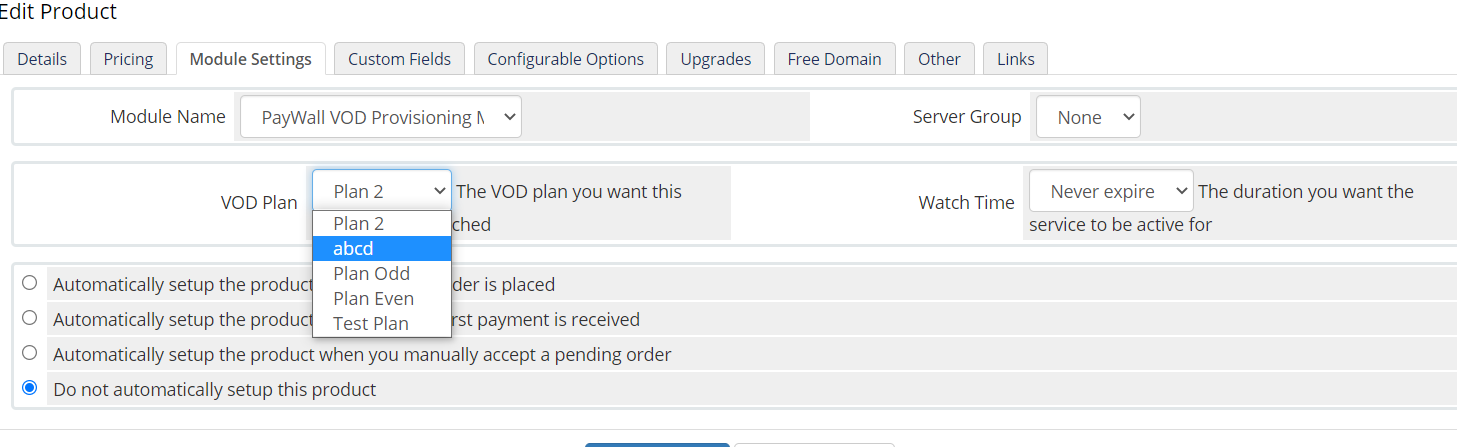
Now select the Plan you want to assign to this Product (Membership) in VOD Plan dropdown.
In the Watch Time drop down, you can set how long the Membership is valid for from the time it is activate. Once the Watch Time passes the set time, the Membership will no longer be able to view any videos.
At the bottom of the page you can set how the system provision the Product when somebody purchase it.
| Table of Contents | ||
|---|---|---|
|