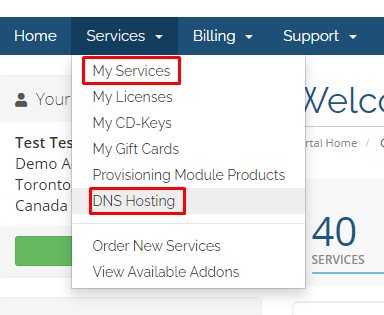
Services My Services → Your DNS Hosting Product or via WHMCS Services tab → DNS Hosting menu
Service Overview
Once your client is in the DNS Hosting's service page, they should see a similar screen as this.
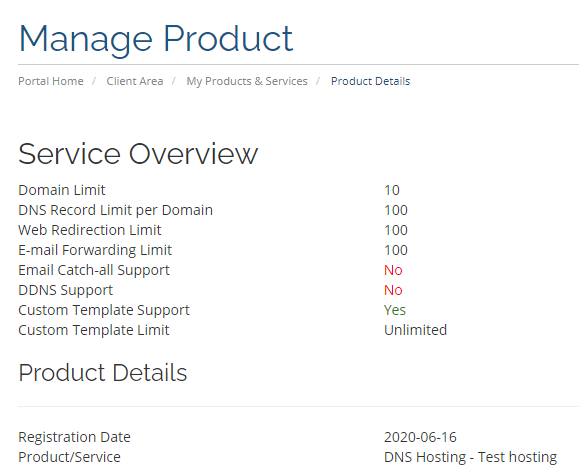
On the side Action menu, they should see a Manage Domain option. This is where they can manage the service.
Manage Domain
On the Manage Domain overview, your client should see three tabs.

Domain Status
This tab will allow your client to manage the DNS for an activated domain, remove an un-verified domain and trigger a manual verification..
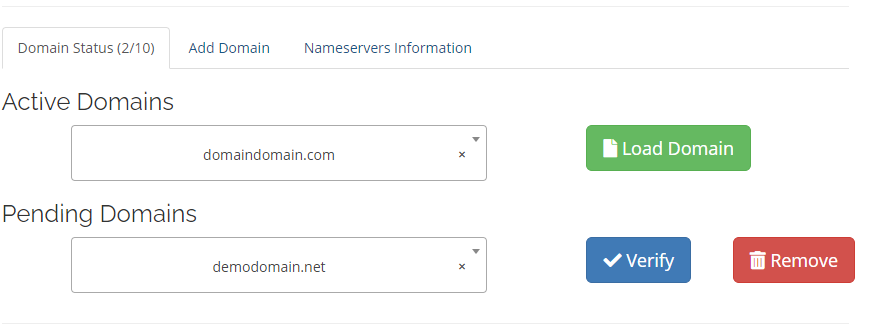
The manual Verify button is only avialbe, if you have enabled Module Options → Allow Manual Domain Verification
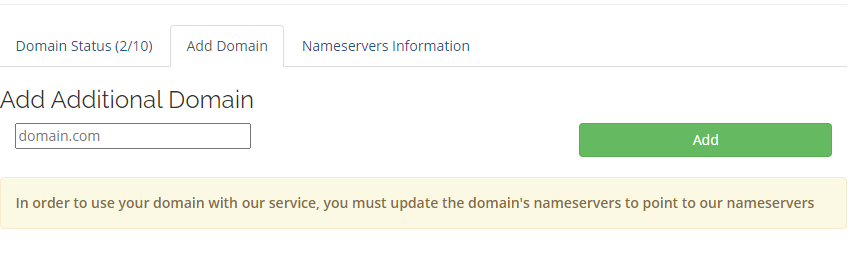
Add Domain
In this tab, your client will be able to add the domain to the system.
Nameservers Information
This is tab, your client can see the nameservers required to activate the domain.
Load Domain (Manage DNS, Web Redirect, Email Forwarding, Catch-all, Dynamic DNS, Load/Restore DNS Template)
Under the Load Domain page, the client may see up to the following six tabs. Overview, DNS Zone Editor, Web Redirect, Email Forwarding, Email Catch-all, Notification

Overview
For your clients to access the module, they can either go through the WHMCS Domains tab → DNS Manager or via domain details page → Side bar menu → Manage DNS Records, Email Forwarding & Redirect
Once entered, the module will ask for the client to select from the list of Active domains under the account to manage.
Index Page
On the Index page, client may see 6 different tabs depending on the module config.
Overview, DNS Zone Editor, Web Redirect, Email Forwarding, Email Catch-all & Notification. Each of these can be enable/disable in the Module config.
Overview Tab
Switch Namesvers
In the Overview tab, it will show the domain's nameserver status. If the domain isn't set to the default nameserver for the module, then a notification will be shown to the client and allowing them to Switch Nameserver to the default nameservers.
Reset Domain
The client will have the ability to Reset the domain back to original state
Clear DNS
The client will have the ability to clear all the DNS records under the zone. Leaving all the email forward, catch-all, redirect intact.
DNS Templates (Professional Edition Only)
Depending on the module config, your client will be able to create it's own DNS template and/or restore from System DNS templates or it's own.
The client may choose the Preserve my currentDNSrecords option to keep it's current DNS records in the zone during a template restore.
Dynamic DNS API / DynDNS (Professional Edition Only)
This option allows for the client to automatically update it's A record using a remote API call, similar to many DDNS provider.
Special note: If the client has multiple A record, the module will only update the 1st one it finds.
DNS Zone Editor
The client can modify and manage the domain's DNS zone within this tab. Each of the records (A, AAAA, CNAME, MX, TXT, SRV, NS) can be limited and enable/disabled individually based on your liking.
NS records, the module is designed to not allow clients to manually remove the NS record for the main domain. This is to prevent clients from accidentally removing the NS record causing the whole zone to fail.
Web Redirect (Premium/Pro Edition Only)
The client will be able to manage the web redirection using this tab.
Email Forwarding (Premium/Pro Edition Only)
The client can manage the email forwarding in this tab. In order for the Email Forwarding to work, the client must first add an Email Destination. An email will then be send to the email destination inbox with a verification pin to allow for the client to verify the email destination.
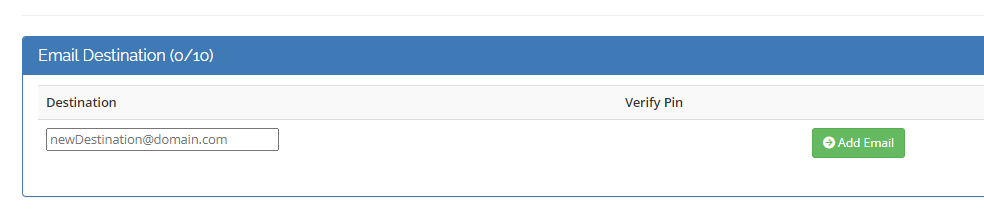
The email client won't be able to assign the Email Destination to a Forwarding Alias unless the Destination has been verified.
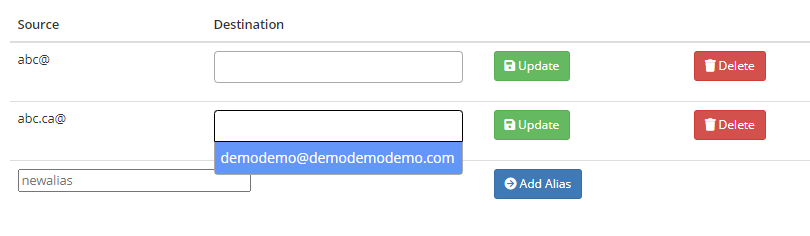
When the client is ready to setup the Forwarding, they can simply use the Add Alias function to add a forwarding source. Once the alias as been added, they can now assign the Email Destination to the Alias.
Email Catch-all
The client will be able to set a catch-all address. Similar to Email Forwarding, the client must first have a verified Email Destination before they can assign to the catch-all.
Notification
The client can choose whether they want to accept email notification regarding changes made within this module.| Table of Contents | ||
|---|---|---|
|